Writing a Windows GUI Application with Windows API was avoided by many programmers due to its complexity, but is it really something to be afraid of?
In the WinAPI you essentially need the WinMain(…), CALLBACK(…) and WndProc(…) functions to create and present a GUI. You will also need a Window Class (WNDCLASS) and the CreateWindow(…) function. Content is provided in the form of Text, Cotrol Elements, Menu and MessageBoxes.
All in all it’s not that bad, mostly some typing if you know what you need. In order for you to gain this knowledge, I have summarized the essential elements along with examples in this article.
Creating a WinAPI Window in Modern C
The following article shows the creation of a basic WinAPI application with a GUI that resembles the most common applications used in the MS Windows environment.
Basics
In another article I showed how to create a very basic WinAPI GUI Application and we will reuse most of this code here. It is a lot of code to make very little happen, but it is the basis of our application and shows a MS Windows window with a text.
We will need two functions, WinMain(…) as a replacement for main() and WndProc(…) as a function that processes the MS Windows event loop. In order to use the types and functions of the WinAPI we include windows.h.
#include <windows.h>

LRESULT CALLBACK WndProc(HWND, UINT, WPARAM, LPARAM);

int WINAPI WinMain(HINSTANCE hInstance, HINSTANCE prevInstance, PSTR cmdLine, int cmdShow)
{
   ... /* code here */
}
Creating and Initializing the Window with the WinAPI
Again, the details are shown in another Article about GUI in C, so we will cover it briefly here. Instead of our beloved main(…) function we now have to use WinMain(…) together with some parameters that are necessary for Windows.
Next we create a windowclass and register it. Then we create the window itself (with a title) and show it to the screen. An EventLoop that collects operating system messages is also started.
...
int WINAPI WinMain(HINSTANCE hInstance, HINSTANCE prevInstance, PSTR cmdLine, int cmdShow)
{
    static TCHAR appName[] = TEXT("Hello WindowsAPI");
    HWND hwnd;
    MSG msg;
    WNDCLASS wndclass;

    wndclass.style = CS_HREDRAW | CS_VREDRAW;
    wndclass.lpfnWndProc = WndProc;
    wndclass.cbClsExtra = 0;
    wndclass.cbWndExtra = 0;
    wndclass.hInstance = hInstance;
    wndclass.hIcon = LoadIcon(NULL, IDI_APPLICATION);
    wndclass.hCursor = LoadCursor(NULL, IDC_ARROW);
    wndclass.hbrBackground = (HBRUSH)GetStockObject(WHITE_BRUSH);
    wndclass.lpszMenuName = NULL;
    wndclass.lpszClassName = appName;

    if(!RegisterClass(&wndclass)) {
        MessageBox(NULL, TEXT("Could not register Window Class!"), appName, MB_ICONERROR);
    }

    hwnd = CreateWindow(appName, TEXT("The Hello Windows Program"), WS_OVERLAPPEDWINDOW, CW_USEDEFAULT, CW_USEDEFAULT, CW_USEDEFAULT, CW_USEDEFAULT, NULL, NULL, hInstance, NULL);

    ShowWindow(hwnd, cmdShow);
    UpdateWindow(hwnd);

    while(GetMessage(&msg, NULL, 0, 0)) {
        TranslateMessage(&msg);
        DispatchMessage(&msg);
    }

    return msg.wParam;
}
...
Processing MS Windows Events with the WinAPI
The CALLBACK(…) function is called when the event loop fires events from the operating system. For each event you can react with whatever is necessary and/or appropriate.
The WM_DESTROY event announces the upcoming shutdown of the application, WM_PAINT is fired whenever a repaint of the window is necessary (e.g. because you moved it). WM_CREATE is fired on creation of the window and we will do something here later.
...
LRESULT CALLBACK WndProc(HWND hwnd, UINT message, WPARAM wParam, LPARAM lParam)
{
    HDC hdc;
    PAINTSTRUCT ps;
    RECT rect;

    switch (message)
    {
    case WM_CREATE:
        /* Add Initialization Code */
        return 0;
    case WM_PAINT:
        hdc = BeginPaint(hwnd, &ps);
        GetClientRect(hwnd, &rect);
        DrawText(hdc, TEXT("This is your first Windows Window!"),-1, &rect, DT_SINGLELINE | DT_CENTER | DT_VCENTER);
        EndPaint(hwnd, &ps);
        return 0;
    case WM_DESTROY:
        PostQuitMessage(0);
        return 0;
    default:
        break;
    }

    return DefWindowProc(hwnd, message, wParam, lParam);
}
Our Hello World Window
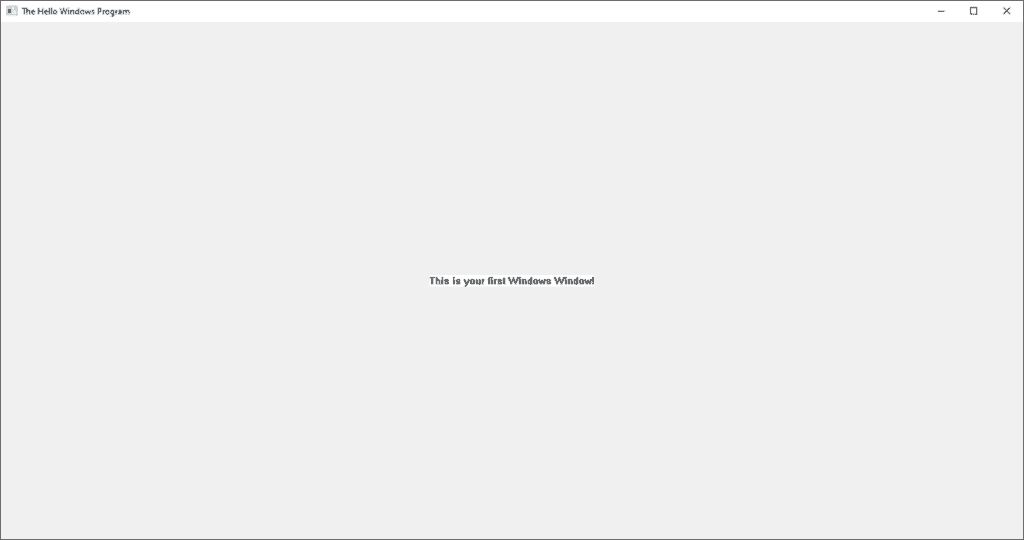
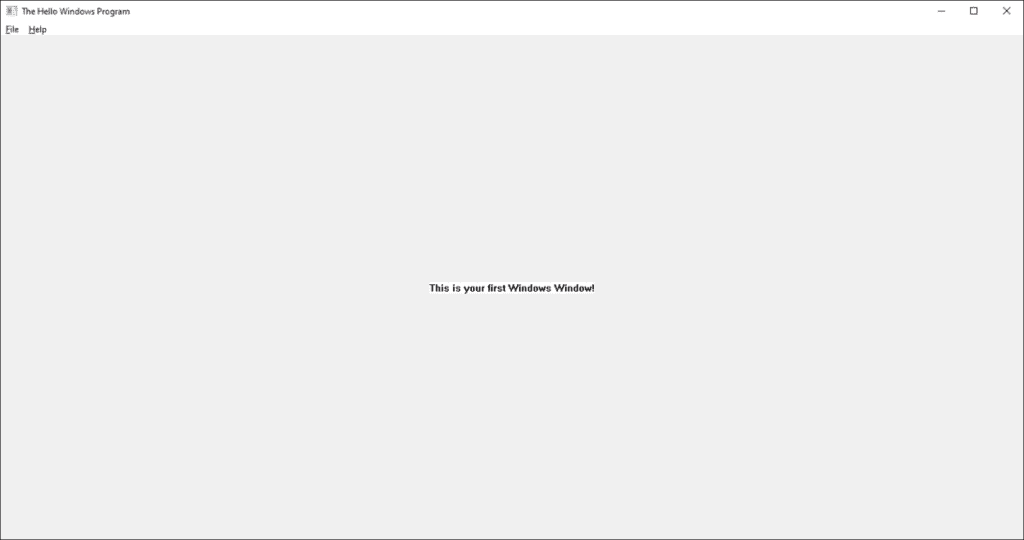
If you compile what we have coded so far, you should get a window with a title, a white background and a black text in the center of the screen.
Compiler Notice: You have to link gdi32 to link the Windows functionality into your code, otherwise you will get a linker error. In gcc you can do it with the -lgdi32 option (e.g. gcc main.c -o winapi -lgdi32)
Menus
Most windows have a menu bar at the top where the user can find some actions that he is able to perform with the application. Let’s create a menu bar for our example application.
On the top we add the declaration for an add_menu(…) function which takes the window reference as a parameter.
In the function itself we create four menu items, two of them are main menu items and two are sub menu items. Last we add the created menu to the main window with help of the hWnd Reference.
The & character underlines the following letter and enables access via the ALT Key+Letter (e.g. ALT+F for &File). Make sure that there are no duplicates (like &File and &Format) in the same menu level.
#include <windows.h>
...
void add_menu_bar(HWND);

int WINAPI WinMain(HINSTANCE hInstance...
...
void add_menu_bar(HWND hwnd)
{
    HMENU hFileMenu = CreateMenu();
    HMENU hHelpMenu = CreateMenu();
    HMENU hQuitItem = CreateMenu();
    HMENU hAboutItem = CreateMenu();

    AppendMenu(hQuitItem, MF_STRING, ITEM_QUIT, "&Quit");
    AppendMenuW(hFileMenu, MF_POPUP, (UINT_PTR)hQuitItem, L"&File");

    AppendMenu(hAboutItem, MF_STRING, ITEM_ABOUT, "&About");
    AppendMenuW(hFileMenu, MF_POPUP, (UINT_PTR)hAboutItem, L"&Help");

    SetMenu(hwnd, hFileMenu);
}
Now we have to call the add_menu() function in WndProc(…), namely in the WM_CREATE case so the menu is created when the GUI is created.
...
LRESULT CALLBACK WndProc(HWND hwnd, UINT message, WPARAM wParam, LPARAM lParam)
{
HDC hdc;
PAINTSTRUCT ps;
RECT rect;
switch (message)
{
case WM_CREATE:
add_menu_bar(hwnd);
return 0;
case WM_PAINT:
...
...
}
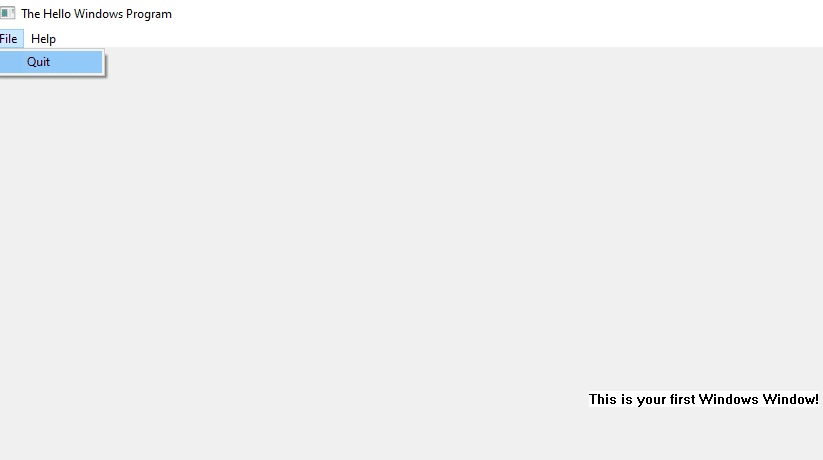
...After compiling and running the application we now have a menu bar with two items which itself contain one item each.
Closing the Application on Menu Item Click
Right now our Menu doesn’t do anything. We want to make the Quit item close the application. When such an item is clicked, WndProc will receive a WM_COMMAND event which we can handle appropriatly.
We extend he switch(message) block and check if ITEM_QUIT was clicked. If yes we will send the PostQuitMessage() in order to close the application.
Now the application should close if you click on File->Quit.
...
LRESULT CALLBACK WndProc(HWND hwnd, UINT message, WPARAM wParam, LPARAM lParam)
{
    ...

    switch (message)
    {
    case WM_CREATE:
    ...
    case WM_PAINT:
    ...
    case WM_COMMAND:
        switch (LOWORD(wParam))
        {
        case ITEM_QUIT:
            PostQuitMessage(0);
            break;
        default:
            /* not handled*/
            return 0;
        }
        break;
    case WM_DESTROY:
    ...
    default:
    ...
    }

    return DefWindowProc(hwnd, message, wParam, lParam);
}
...
Control Elements
A blank window with some text is mostly not what we want so lets add some control elements. First we will add an EditBox where the user can type some text. We will also add a Buttons that the user can click but will do nothing for now.
The call to the creation again happens in the WndProc(..) function where we already created the menu. We declare add_controls(…) and call it in the WM_CREATE case. We also need two new IDs for our control elements.
We also declare the EditBox Element globally so that we can use it later when we implement Message Boxes.
#include <windows.h>

#define ITEM_QUIT 1
#define ITEM_ABOUT 2
#define EDIT_BOX_ID 3
#define SEND_BUTTON_ID 4

LRESULT CALLBACK WndProc(HWND, UINT, WPARAM, LPARAM);
void add_menu_bar(HWND);
void add_controls(HWND);

HWND hEditBox;

...
LRESULT CALLBACK WndProc(HWND hwnd, UINT message, WPARAM wParam, LPARAM lParam)
{
  ....
    switch (message)
    {
    case WM_CREATE:
        add_menu_bar(hwnd);
        add_controls(hwnd);
        return 0;
    case WM_PAINT:
...
The function itself is rather simple; we create an EditBox and a Button with the help of the CreateWindowL(…) function where the first parameter indicates the type of control that we want. The Button also gets a Text which serves as caption. The four numbers are x and y position as well as width and height of the control.
WS_CHILD makes the Element a child of the main window and WS_VISIBLE makes it visible. We also need an ID for each control in order to identify it later (e.g. for button click events, etc.).
void add_controls(HWND hwnd)
{
hEditBox = CreateWindowW(L"Edit", NULL, WS_CHILD | WS_VISIBLE | WS_BORDER, 30, 50, 150, 25, hwnd, (HMENU)EDIT_BOX_ID, NULL, NULL);
HWND hButtonSend = CreateWindowW(L"Button", L"Send Text", WS_CHILD | WS_VISIBLE, 30, 80, 80, 30, hwnd, (HMENU)SEND_BUTTON_ID, NULL, NULL);
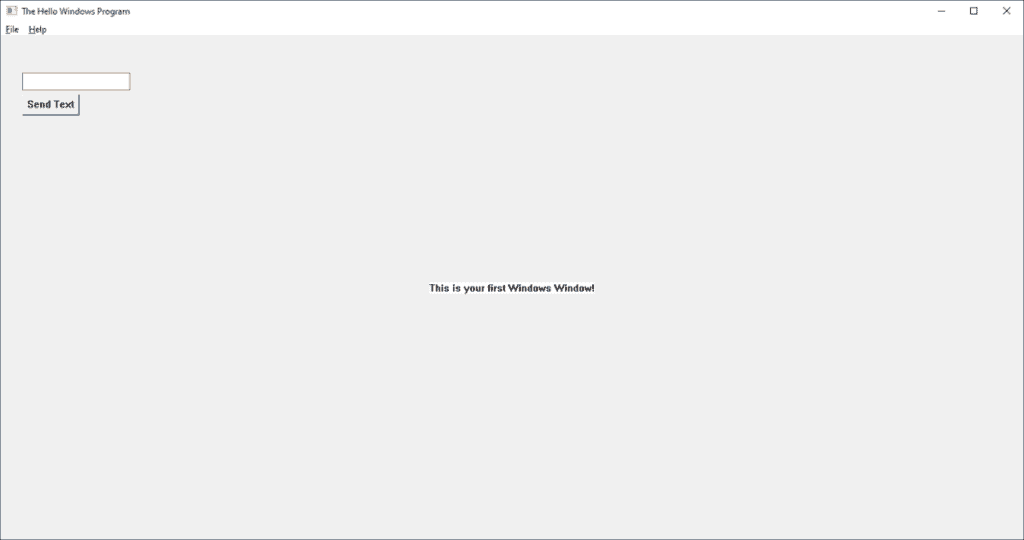
}When we compile and run the application now we get the following result:
Message Boxes
A MessageBox is also a common control element in a GUI. It is an easy way to show important information to the user or to get an answer for a request.
We will implement a simple MessageBox that will show up when we click on our About menu item in the Help section of the Menu Bar. We created this a few paragraphs ago.
In the WM_COMMAND section of the WndProc(…) function we will add another case for the About item. Instead of closing the application we now call a Windows function called MessageBox(…) which will show us a MessageBox with a Title, Text and Button.
I will only show you the part of WndProc(..) that has changed
...
LRESULT CALLBACK WndProc(HWND hwnd, UINT message, WPARAM wParam, LPARAM lParam)
{
...
  case WM_COMMAND:
        switch (LOWORD(wParam))
        {
        case ITEM_QUIT:
            PostQuitMessage(0);
            break;
        case ITEM_ABOUT:
            MessageBox(NULL, TEXT("Thank you for reading this far."), TEXT("A Message Box!"), 0);
            break;
        default:
            /* not handled*/
            return 0;
        }
        break;
...
}
If we now navigate to the menu item Help->About and click the MessageBox will appear.
Remember the Button we added in the Control Elements paragraph? We now give it something to do. When the user clicks the button we will show the text that he entered in the EditBox inside a MessageBox.
We have to visit the WndProc(…) function one last time. In the WM_COMMAND section we check if the event comes from our button (SEND_BUTTON_ID) and then check if the event was a button click (BN_CLICKED). Then we create a buffer that will hold our text and copy the contents of the EditBox into this buffer. Finally we show a MessageBox with a title and our buffer as text.
Now you see why the EditBox was declared globally – we need to access it in two different functions.
...
LRESULT CALLBACK WndProc(HWND hwnd, UINT message, WPARAM wParam, LPARAM lParam)
{
    ...

    switch (message)
    {
    case WM_CREATE:
        ....
    case WM_PAINT:
        ...
    case WM_COMMAND:
        switch (LOWORD(wParam))
        {
        case ITEM_QUIT:
            PostQuitMessage(0);
            break;
        case ITEM_ABOUT:
            MessageBox(NULL, TEXT("Thank you for reading this far."), TEXT("A Message Box!"), 0);
            break;
        case SEND_BUTTON_ID:
            if(HIWORD(wParam) == BN_CLICKED)
            {
                TCHAR buffer[1024];
                GetWindowText(hEditBox, buffer, 1024);
                MessageBox(NULL, buffer, TEXT("Sending Text:"), 0);
            }
            break;
        default:
            /* not handled*/
            return 0;
        }
        break;
    case WM_DESTROY:
        PostQuitMessage(0);
        return 0;
    default:
        break;
    }

    ...
}
Finally when we click on the button the entered text will appear inside a MessageBox.

Summary
This was a brief introduction to GUI Programming with the WinAPI in C. From here you can write your own programs and begin to add more control elements and functionality.
If you want to try out an alternative GUI that you can program in C you can e.g. read about SDL (Simple DirectMedia Layer) in this article. In contrast to WinAPI, SDL is portable.